
AI Garden Design Generator: Turn Ideas Into a Real Garden Plan
A picture of the garden you want is one photo away. An AI garden design generator turns a snapshot of your yard — plus a style you love — into a photorealistic redesign and a plant list you can actually dig into this weekend.

But a pretty render is only the start. The real value is turning that image into a plantable plan that fits your climate, your light, and your soil — and this guide walks you through exactly that.
What an AI Garden Design Generator Actually Does
An AI garden design generator is, at its core, an image-to-image tool: it reads the photo you give it — the fence line, the patio edge, the bare border — and repaints that same space in a new style using generative AI. Some tools call themselves an AI garden planner, others lean on the label AI landscape design or photo-to-design AI, but the mechanics are similar across the category.
Most generators bundle a similar core set of outputs once you’ve uploaded a photo and picked a direction:
- A photorealistic render of your space in the chosen style
- A plant list matched to that render, at least in the better tools
- Several style variations to compare side by side
- A rough cost estimate, on some platforms
You’ll find a wide range of style libraries depending on the tool. Neighborbrite reports 800,000-plus users and 20 million-plus designs generated across 170-plus countries, and offers 16 garden styles. AIGardenPlanner lists over 50 style options, while GenRoom offers around 18. Whichever tool you pick, the render itself usually lands fast:
- Modern and minimalist — clean lines, structured beds, restrained plant palettes
- Cottage — layered perennials, informal borders, softer edges
- Xeriscape or desert — drought-tolerant plantings, gravel, succulents
- Native — regional plants suited to local pollinators and soil
- Tropical — broad-leaf foliage, dense layering, bold color
From photo to render in minutes
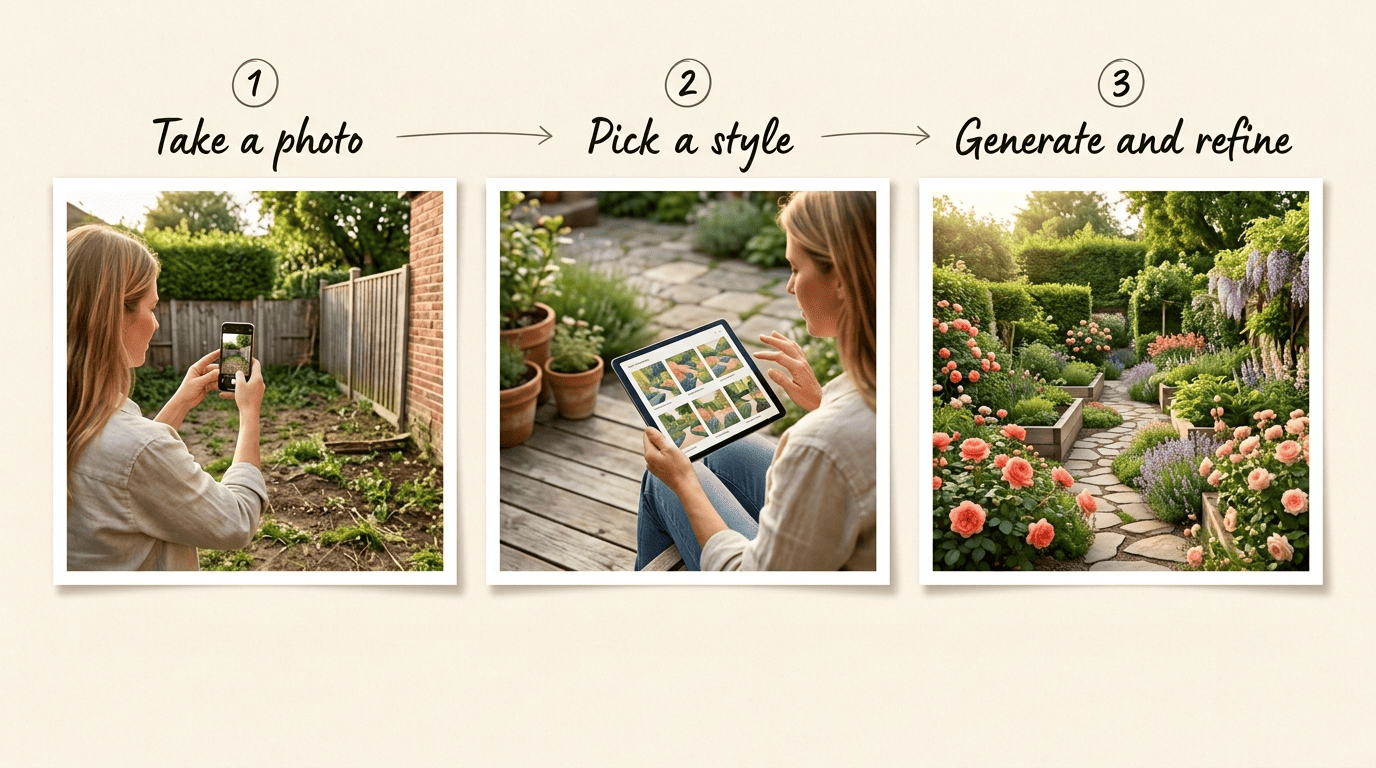
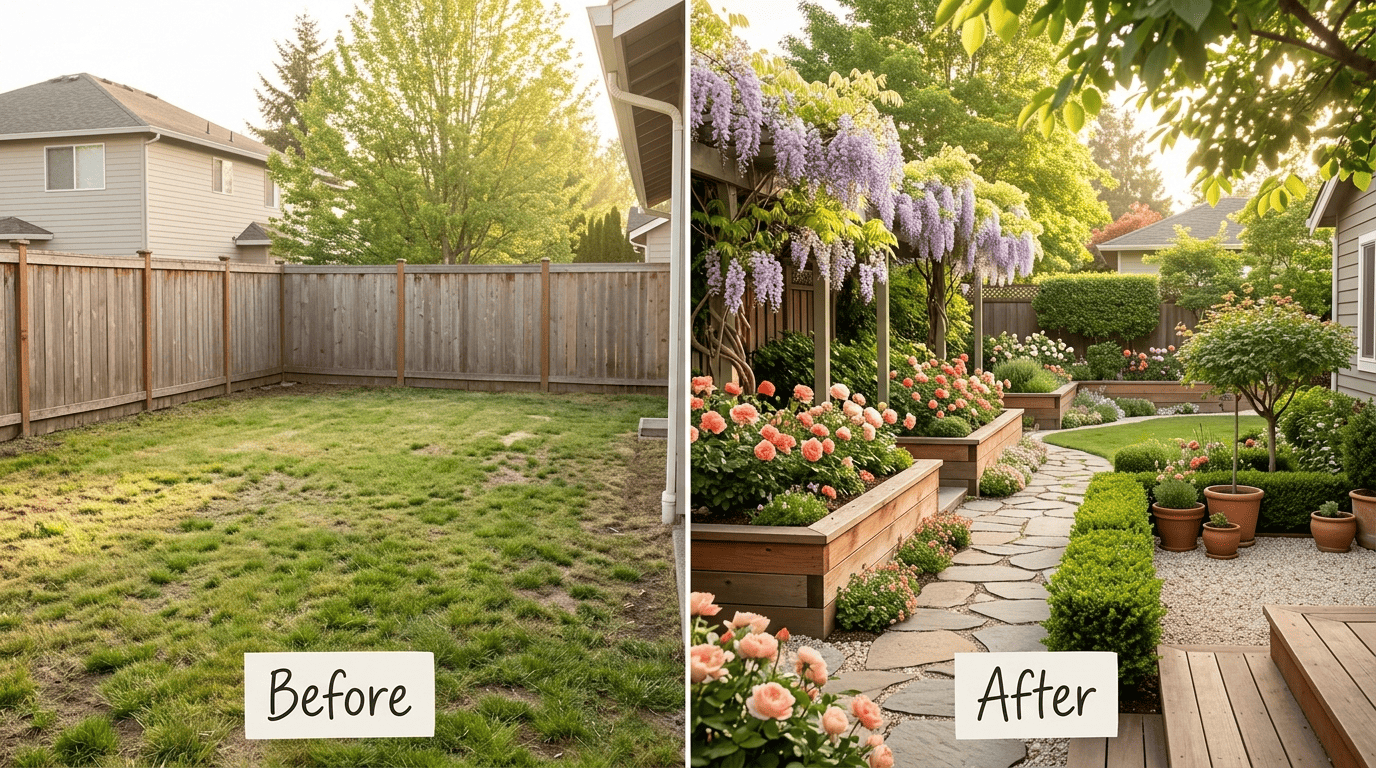
You upload a photo of your yard, patio, or a bare border; the generative-AI model reads the existing layout, light, and structures, then repaints the space in the style you pick. Across these tools, renders typically land in roughly 30 seconds to 2 minutes — Neighborbrite, for instance, targets about 2 minutes — fast enough to try three or four styles in one sitting before committing to any of them.
Not a blueprint — a visualization
Penn State Extension has actually tested a batch of these tools against real garden beds, and its review is a useful reality check. Reviewing a Microsoft Copilot design against her own beds, Area Master Gardener Coordinator Lois Miklas noted:
Though neither the native plant nor the vegetable bed diagrams supplied by Copilot were strictly to scale, they would be a helpful starting point.
Lois Miklas, Penn State Extension
That framing holds for most AI garden design tools: they’re excellent at generating a starting point and terrible at replacing a tape measure, a soil test, or a grading plan.
Photo to Design: The Workflow Step by Step
The actual mechanics behind most tools boil down to three moves — upload, style, render — though the details of what you can adjust vary by platform. For the photo-based path specifically, this walkthrough of AI garden design from photo covers how to get the cleanest input image before you generate anything.
- Take a photo the AI can read. Shoot in good daylight, hold the phone steady, and frame the whole bed or border with a little of its surroundings. Avoid heavy shadows, clutter, and extreme angles — a clear, straight-on shot gives the model the most to work with.
- Pick a style and set the scene. Choose a look — modern, cottage, xeriscape, native, tropical — and note the space type: backyard, patio, or front border. Wider style libraries (AIGardenPlanner’s 50-plus, for example) give you more to compare before you settle on a direction.
- Generate, compare, refine. The tool returns one or more renders; compare styles side by side and regenerate until the massing and color flow feel right. Most tools let you cycle through several variations before you lock in a favorite.
Matching the Design to Your Climate (USDA Hardiness Zones)
Style is only half the job — the render also needs to hold up through your winters. Any AI garden design worth using should be checking suggested plants against where you actually live, not just how the design looks in the photo.
How hardiness zones work
The USDA Plant Hardiness Zone Map divides North America into 13 zones based on average annual minimum winter temperature, and it’s the reference standard most gardeners and nurseries use to decide what will actually overwinter in the ground. Each zone spans a 10°F band, split further into A and B sub-zones of 5°F each — 26 bands in total, running from Zone 1A (−60 to −55°F) to Zone 13B (65 to 70°F). You can look up your exact zone on the official USDA Plant Hardiness Zone Map. The current map is built on 1991–2020 climate data and was updated in 2023; more background on how the system works is available on Wikipedia.
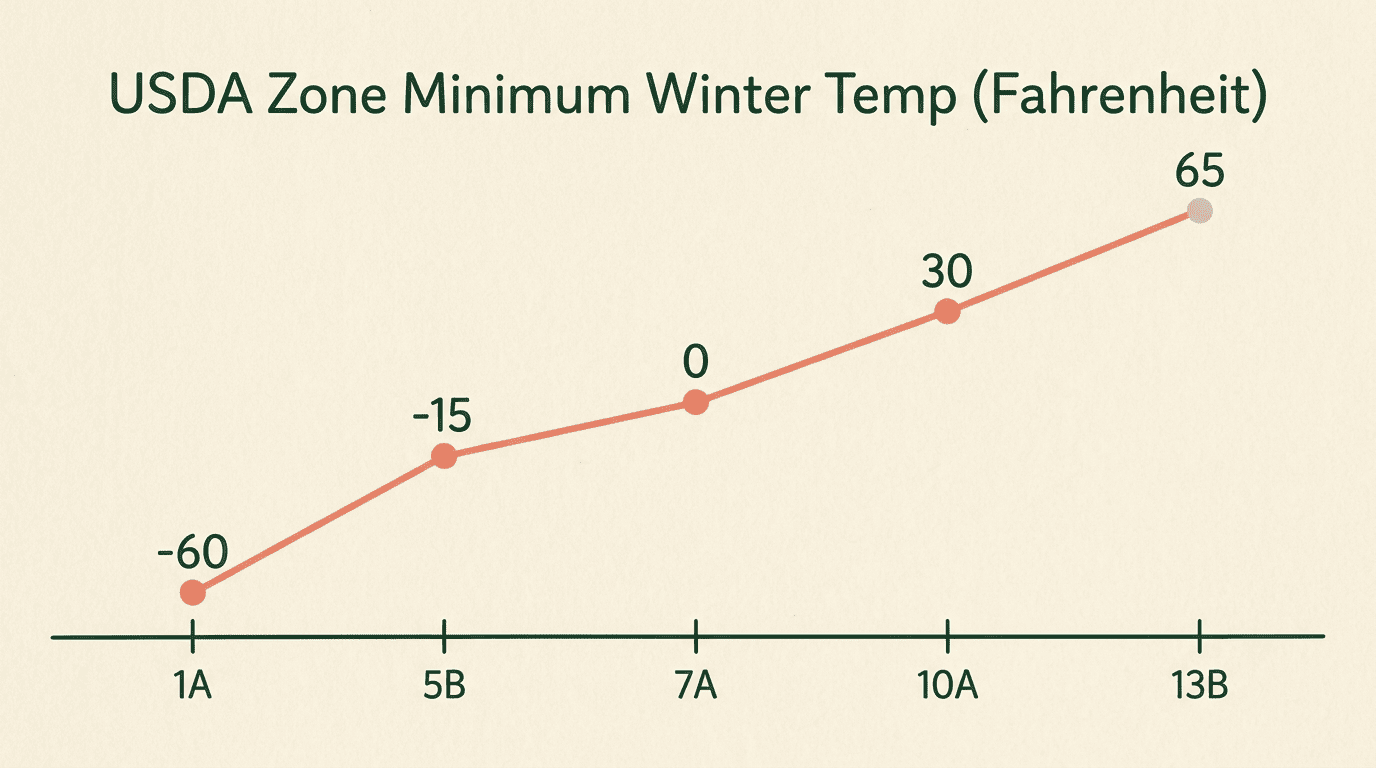
| Zone | Average Min. Winter Temp | Example Region |
|---|---|---|
| 1A | −60°F to −55°F | Interior Alaska |
| 5B | −15°F to −10°F | Upper Midwest |
| 7A | 0°F to 5°F | Mid-Atlantic |
| 10A | 30°F to 35°F | Coastal Southern California |
| 13B | 65°F to 70°F | Tropical Puerto Rico |
Why the plant list should filter to your zone
A good AI garden design generator filters its plant list to your zone so every suggestion can actually survive your winters, rather than just looking good in a summer render. That filtering only matters if the underlying zone is right, though — always confirm your exact zone on the official USDA map, and check with a local garden center or nursery before you buy, since microclimates and soil conditions can shift the practical answer block by block.
Turning the AI Render Into a Real, Plantable Plan
A render answers «does this look good?» It doesn’t answer «will this survive, drain properly, or hit a gas line?» Closing that gap is what separates a picture from a plan.
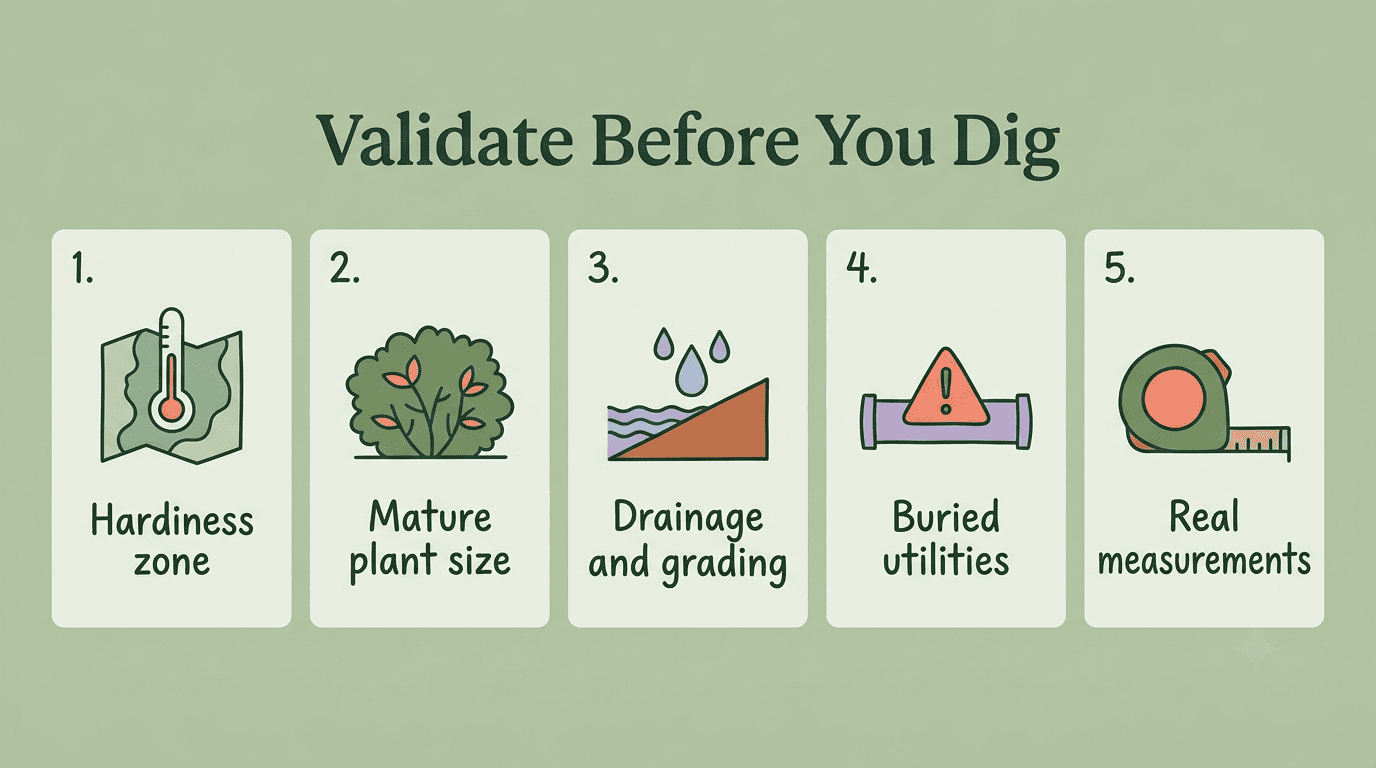
Validate before you dig. Treat the render as a design brief, not a finished document. Before you plant anything, confirm the hardiness zone match, check each plant’s mature size against the space you actually have, and think through drainage and grading on the site. Tools like AIGardenPlanner ask you to plug in real dimensions for exactly this reason — a render scaled to a photo isn’t the same as a bed measured with a tape.
- Confirm the hardiness zone for every plant on the list
- Check each plant’s mature height and spread against the bed
- Assess drainage and grading — water needs somewhere to go
- Call 811 or your local utility locator before digging near buried lines
- Measure the actual bed instead of trusting the render’s proportions
For laying the plants themselves out on a grid — spacing, groupings, sightlines — an AI garden planner is the better next step once the style is settled and the measurements are real.
Build your plant list and budget. Export or rebuild the plant list, group entries by sun and shade zone so nothing ends up baking or starving for light, and favor native plants where your zone and soil allow — they tend to need less babying once established. Some tools tack on rough cost estimates, which helps you catch a budget problem before you’re standing in a nursery parking lot. Swap out anything that won’t thrive in your zone for a comparable pick your local nursery actually stocks.
Free vs Paid: What to Expect
Most people can get a genuinely useful first pass without paying anything. Several tools, including Neighborbrite, offer free rendering, and some AI-assisted design tools provide unlimited free renders for exploring styles and massing. Typically, upgrading unlocks:
- High-resolution exports you can print or share with a contractor
- Larger style libraries and more render variations per session
- Fuller plant lists with care notes and sourcing info
- Rough project cost estimates
Where paid tiers earn their keep is in the details: higher-resolution exports you can actually print or share with a contractor, larger style libraries, and fuller plant lists with care notes — the difference between a free render and an AI garden design tool you can actually build from. Plans generally run from around $9 a month on the low end up to $29 or more for the fuller feature sets. For anything structural — grading, retaining walls, drainage systems, or utility work — a landscape architect or designer, typically billing $50 to $150 an hour, is still the safer call than trusting a render.
| Option | Cost | Best For |
|---|---|---|
| Free tier | $0 | Exploring styles, testing massing and color |
| Paid plan | ~$9–$29+/mo | High-res exports, larger plant lists, more styles |
| Landscape architect/designer | $50–$150/hr | Grading, drainage, structural or hardscape work |